
When we first moved in, one of my very most favorite parts of our house was the walk in pantry. It seemed like so much awesome storage space. Notice the use of the past tense. So here's what happened... 1)We accumulated 2 1/2 years worth of crap in the pantry 2) Our microwave caught on fire(!), which caused me to pay attention to the pantry a bit more. So lets see what she was looking like as of first thing December 26...


The first stage of the plan was two fold:
1) Tear down the crazy cabinet. This will allow me to move the microwave to that wall. Add a pot rack over the microwave for over flow pots.
2) Once the cart is moved, add 3 more shelves to add more more storage space and more organization.
So back to December 26. I started by going to Lowes to get the lumber I would need to build the shelves. The biggest flaw with this is my confidence that I knew exactly what I needed. See, it happens that no matter how well I think a project through, I almost always end up having to go back to Lowes to get something else. When relating projects back to my dad, I do so in terms of how many trips to Lowes I had to take ("You'd be so proud of me, I only had to take 6 trips to Lowes!") Luckily, Lowes is right around the corner, so this is really no big deal other than the frustration factor.
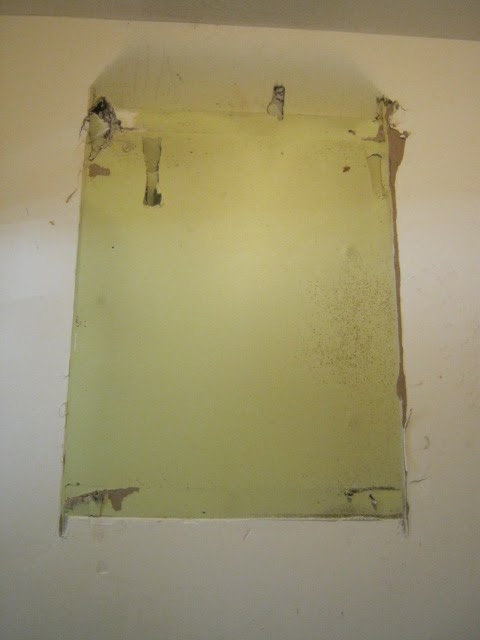
With shopping completed, I figured my first logical step was to take down the cabinet. I read enough Young House Love to assume that all I would need to do was unscrew a couple screws and gently lower the cabinet to the ground. I even said to Seth "Hey, I bet we could put this in the garage..." So imagine my surprise when there were no screws holding the damn thing up. All I could see were 4 nails that were angled in a way that made them impossible to remove. So I did the only logical thing and demoed that POS to death. Sadly, the walls in that section of the house were in not such great shape and everytime I tried to pry the cabinet, I ended up putting my hammer through the wall...

So with demo completed, I turned to shelf installation. I wanted the new shelves to match the old ones, which required running 1x2's and then setting the 1x12s on top to create a shelf.


Once my supports were up, I just had to measure and slap my 1x12s into place. I started at the bottom so that I would have plenty of room work.


Lets leave this already too long post there for now. I promise I'll be back with full instructions on patching dry wall and exciting after pictures.
No comments:
Post a Comment