So, I pulled a disappearing act on y'all again... SORRY! But I am here, once again, to try and redeem myself with the awesome tale of my Christmas Pantry Project (do you have an idea how many times I have typed PANTY instead of PANTRY?!).
When we first moved in, one of my very most favorite parts of our house was the walk in pantry. It seemed like so much awesome storage space. Notice the use of the past tense. So here's what happened... 1)We accumulated 2 1/2 years worth of crap in the pantry 2) Our microwave caught on fire(!), which caused me to pay attention to the pantry a bit more. So lets see what she was looking like as of first thing December 26...
This was the straight on view, that is what you can see from the kitchen. So much crap, literally, check out the placement of the litter box.
This is the view to the right, total and complete chaos.
And the view to the left. Check out the oddly placed cabinet. I swear, I have smacked my head on there a billion times. Sucker has to go.
And a quick shot of the upper most shelf, just to truly round out the horror. Note how everything looks like it may fall any moment.
The first stage of the plan was two fold:
1) Tear down the crazy cabinet. This will allow me to move the microwave to that wall. Add a pot rack over the microwave for over flow pots.
2) Once the cart is moved, add 3 more shelves to add more more storage space and more organization.
So back to December 26. I started by going to Lowes to get the lumber I would need to build the shelves. The biggest flaw with this is my confidence that I knew exactly what I needed. See, it happens that no matter how well I think a project through, I almost always end up having to go back to Lowes to get something else. When relating projects back to my dad, I do so in terms of how many trips to Lowes I had to take ("You'd be so proud of me, I only had to take 6 trips to Lowes!") Luckily, Lowes is right around the corner, so this is really no big deal other than the frustration factor.
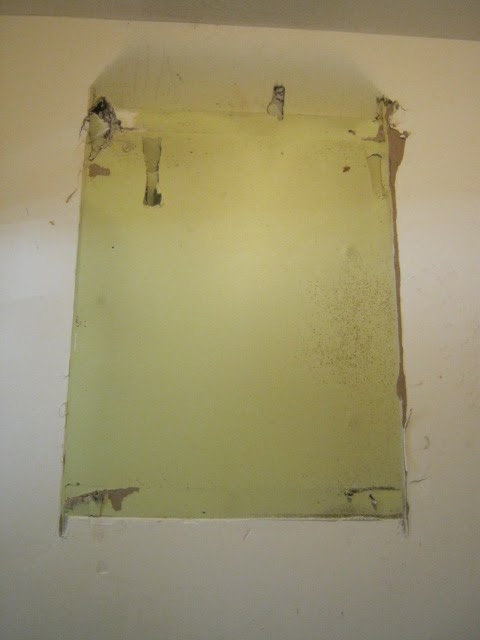
With shopping completed, I figured my first logical step was to take down the cabinet. I read enough Young House Love to assume that all I would need to do was unscrew a couple screws and gently lower the cabinet to the ground. I even said to Seth "Hey, I bet we could put this in the garage..." So imagine my surprise when there were no screws holding the damn thing up. All I could see were 4 nails that were angled in a way that made them impossible to remove. So I did the only logical thing and demoed that POS to death. Sadly, the walls in that section of the house were in not such great shape and everytime I tried to pry the cabinet, I ended up putting my hammer through the wall...
Womp, womp. Cue trip two to Lowes for hole fixing supplies. I am happy to report that this was the last trip to Lowes for this project ("A magical two tripper, Dad!"). Please do note the festive avocado green walls that were uncovered.
So with demo completed, I turned to shelf installation. I wanted the new shelves to match the old ones, which required running 1x2's and then setting the 1x12s on top to create a shelf.
To start this, I lined my new 1x 2 up with the existing piece of wood. I made sure that they were nice and flush and tacked it in with a screw.
Then, I leveled the piece of wood and tacked in another screw at the other end. This made a nice level ledge for the 1x12 to sit on.
I added more screws to ensure that everything would hold well. I did my best to hit studs. If you don't have a stud finder and arent good at the knocking of the wall thing, you can use an outlet to figure out where studs are. Basically, you know that a stud in on either side of an outlet. Once you figure out which side, you can measure out 16 inches and generally hit a stud each time.
Once my supports were up, I just had to measure and slap my 1x12s into place. I started at the bottom so that I would have plenty of room work.
I secured the 1x12 to the 1x2 along the edges with screws.
For added stability at the corners, I toe screwed the new 1x12 to the existing 1x12.
All done and ready to be painted. Luckily, Seth made an appearance at the point and helped me paint the new shelves quickly.
Lets leave this already too long post there for now. I promise I'll be back with full instructions on patching dry wall and exciting after pictures.


