I really love Christmas. This holiday combines a lot of the things I enjoy- cooking, spending time with my family, driving Seth crazy, and decorating. This weekend, we finally got around to that last one. I try hard not to go over board and I think I usually do a pretty good job.
The Christmas tree is up (sorry for the kinda blurry picture). The only presents we've gotten around to wrapping are the ones Seth picked out for Ella. I am a little behind this year.
The baby artificial tree I got in college is up on the sideboard. In a few years, I imagine Ella will have a blast with this one.
And the stockings are up. Seth and I both have our stockings from when we were young and we ordered a similar knit stocking for Ella. I like that the stockings don't match, it kinda shows how our family has been built over the years.
We also have wreathes on both doors and lights up on the fence, but that is it. The house feels Christmasie (Christmasy?) without feeling obnoxious.
I really am so excited for this Christmas!
Showing posts with label decorating. Show all posts
Wednesday, December 12, 2012
Tuesday, December 4, 2012
One Man's Trash...
Its no secret that I am perfectly willing to pick up things off the side of the road in hopes of restoring them in some fashion (I come by it naturally- my mom is the queen of finding roadside treasures). So when I was out running a summer ago (yes more than a year ago) and I found this beauty, I had to go back and get it...
Yes, thats right- an old school chair, plastic seat and all. I placed this sweet little chair on the front porch with promises that I would make it pretty real soon. And that didn't happen. The chair ended up sitting there, unloved, for well over a year. Whoops.
But with the impending arrival of Seth's family for Thanksgiving, I finally found the motivation to make this lovely actually lovely.
I started by taking the chair apart and sanding it well.
I spray painted the frame oil rubbed bronze. The light fixture on the porch is ORB, so I figured a darker frame would go better.
I spray painted the sets green.
And put it all back together...
Yes, thats right- an old school chair, plastic seat and all. I placed this sweet little chair on the front porch with promises that I would make it pretty real soon. And that didn't happen. The chair ended up sitting there, unloved, for well over a year. Whoops.
But with the impending arrival of Seth's family for Thanksgiving, I finally found the motivation to make this lovely actually lovely.
I started by taking the chair apart and sanding it well.
I spray painted the frame oil rubbed bronze. The light fixture on the porch is ORB, so I figured a darker frame would go better.
I spray painted the sets green.
And put it all back together...
And placed it back in its home on the porch.
Like most projects I tackle, this was insanely easy and fast. It really is embarrassing that it took me so long to finally get this done, especially because it looks SO much better. I think the chair needs a plant or something sitting on it. Hopefully it wont take me more than a year to get on that...
Tuesday, November 13, 2012
Mirror, Mirror on the Wall
One of the many things I love about my husband is that he not only tolerates, but supports and encourages me to pick up things off the side of the road. Imagine my delight when he came home with this ugly ass mirror...
He pulled it our a garbage can. The things we do for love...
Other than the light oak colored laminate and fake marble pieces (see below for picture), this baby had some real potential. It is huge and has a nice shape to it. I hoped a little spray paint could fix her right up. But I was also knew there was the chance that no amount of spray paint could save this puppy. Since the mirror was free and spray paint is only $4 a can, I decided to go for it.
I started by wiping everything down really well and tapping newspaper over the actual mirror. And then it was time for Valspar's metallic silver spray paint.
It only took a few coats to make this baby look good as new. It even covered the laminate counter bits perfectly. Having the frame in just one color (not two different types of laminate and metal) made a huge difference- it looks much more cohesive.
And then it was time to hang it. I forgot to take pictures of the mirror that was in this spot before, but don't worry it has a new home.
I love that the mirror has similar detailing as the sideboard. And the scale of the mirror is much more appropriate based on how big the side board is.
Anyone else redeem a piece with some spray paint?
Friday, October 5, 2012
The Nursery!!
First, and most importantly, little bit made her appearance last week, Friday, September 28, a whole 2 weeks early! Seth and I were totally shocked when my water broke, but really she has been full of surprises from start to finish, so that was a fitting way for her to come into the world. I am working om her birth story and will also have a full report on how we have all settled in (canine and feline children included). So for now, just a quick picture of her all dressed and ready to leave the hospital.
And now, as promised many times, the NURSERY! Fortunately, I had it pretty much done when I went into labor. However, I am thankful to my mama who went by and hung up a few things for me and organized some diapers. If she hadn't done that, I can promise that the nursery would still be a mess. So without further ado...
Another view of the left side of the room. In this one, you can see the fun lamp we got her.
The view of the right side of the room, including her crib, shelves, and some other artwork.
And for two close ups of some details...
The mobile I made for her...
And the animal art...
Even though her room is really only used for diaper changes and storing all her stuff (she sleeps in a pack and play with a bassinet in our room), I am totally thrilled with the room. I feel like it is feminine enough for a girl without being girlie. Its a fun room that should last her until she transitions into a big girl room (which would happen when baby 2 gets here, which will be a few years).
This is the view from the hallway. You can see the curtains mom helped me make, the glider I recovered, and the sweet blanket Ella's Great Aunt Missy knit for her.
This is the view looking back towards the hallway. You can see the animal art I made, as well as her shelf. The shelf has been attached to the wall with L-brackets so that there is no was it can fall over on her once she in mobileAnother view of the left side of the room. In this one, you can see the fun lamp we got her.
The view of the right side of the room, including her crib, shelves, and some other artwork.
And for two close ups of some details...
The mobile I made for her...
And the animal art...
Even though her room is really only used for diaper changes and storing all her stuff (she sleeps in a pack and play with a bassinet in our room), I am totally thrilled with the room. I feel like it is feminine enough for a girl without being girlie. Its a fun room that should last her until she transitions into a big girl room (which would happen when baby 2 gets here, which will be a few years).
Friday, August 31, 2012
A Really Long Post about Recovering a Glider!
Before we get started with this post, let me make a few things very clear:
You can't really tell in the photo, but the fabric is a nice light blue and white stripe. Want a close up?
Not bad, just not what we are going for...
So to get started, first I panicked and then I pinned (as in, consulted Pinterest). I found two great tutorials (this one and this one) and decided to mix those methods for my plan of attack.
Step 1: Rip some seams
I used my seam ripper to pull apart the top backy piece and the bottom piece. This left me with the inserts for the back and bottom and pieces that I could use as a pattern.
For the back piece, you'll notice that part of it has some extra cushioning. I left this part on and planned to use it.
Step 2: Make a Pattern
For this project, we wanted some nice soft, baby friendly fabric. Although, it is not upholstery fabric, I picked up some black minky dot fabric from Hobby Lobby (love their sales!). I got 3 1/4 yards and had a lot left over. I think 2 1/2 yards would have worked. So, back to work... I laid my old pieces out and pinned them to my new fabric and cut (generously) around them.
Step 3: Keeping the seams
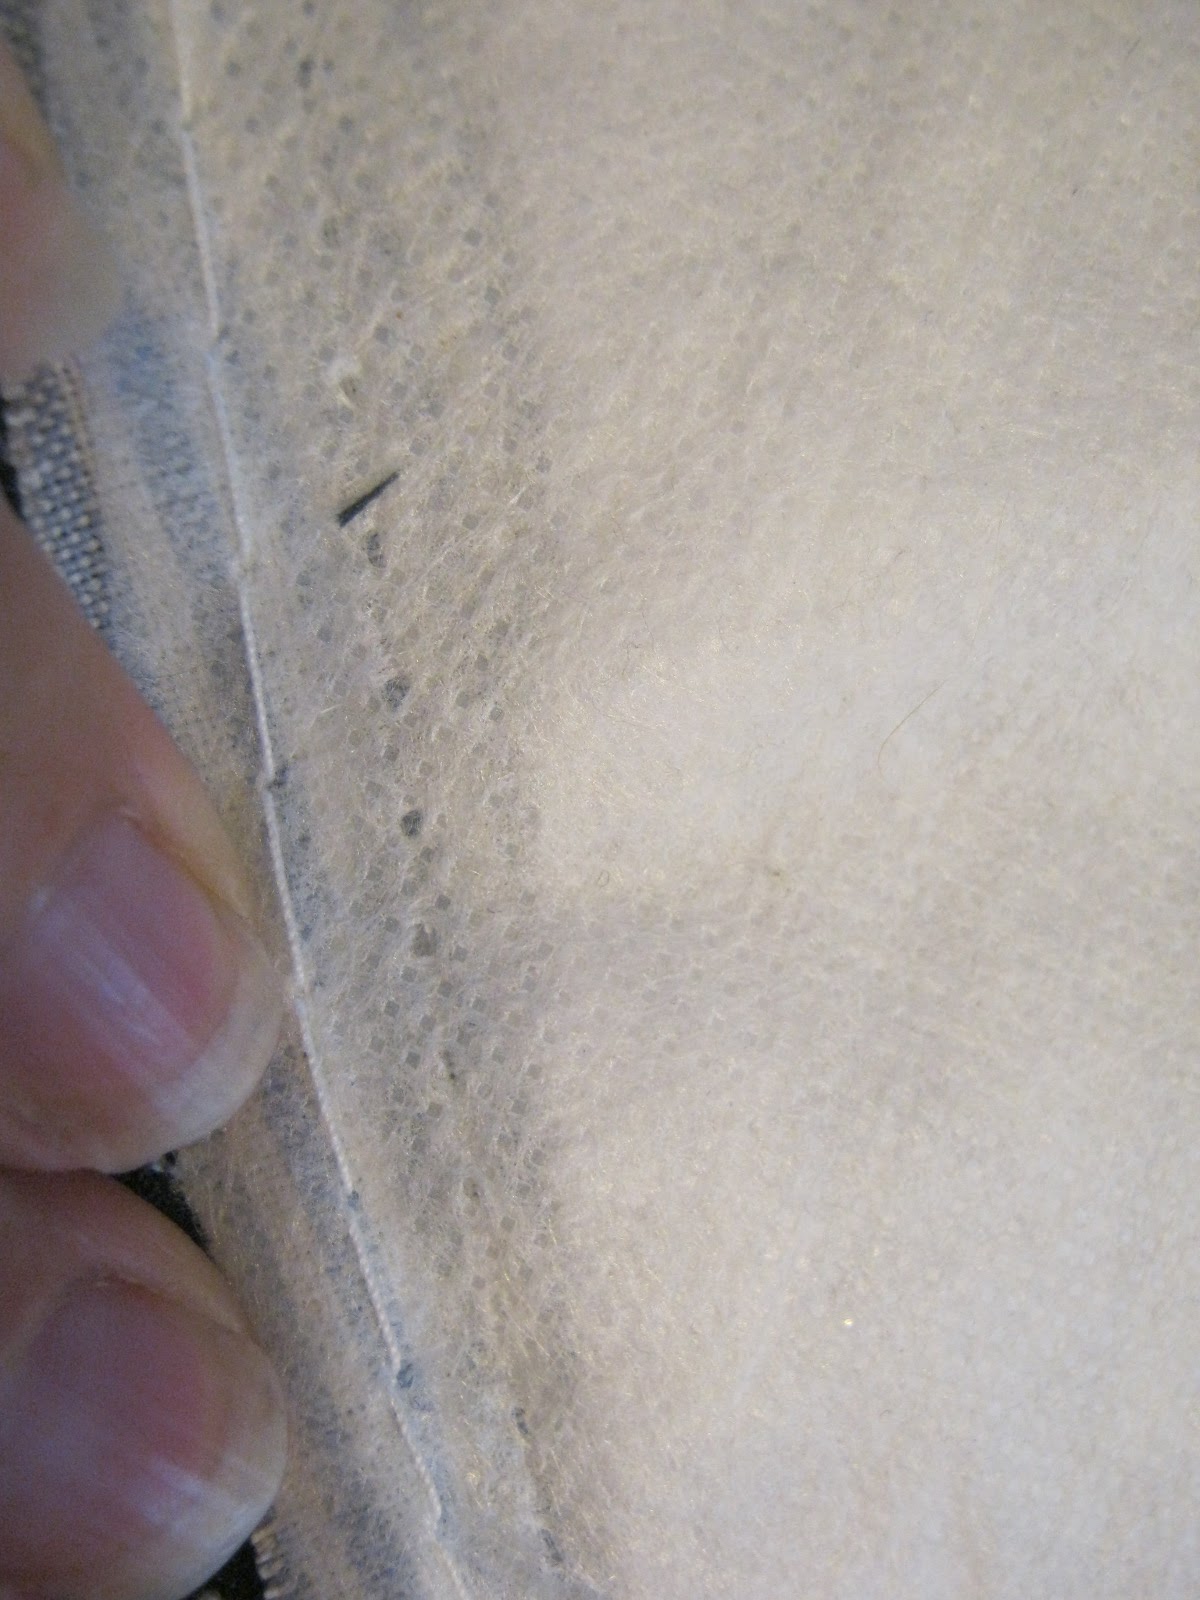
This step can also we called: here's where it starts to get complicated... but not really. So, if you look at the original glider, you'll see all these nice seams on the back piece. Since I planned to use the fluffy back piece (like in this tutorial), I figured I should add the seams. I found out the hard way (I snapped a needle) that the best way to do this is to use a heavy duty needle and just gently follow the seam lines that are already laid out.
Step 4: Putting it all together
So now I have one backy piece attached to a fluffy piece and I need to attach the other backy piece, essentially making a giant, oddly shaped pillow case. I pinned my pieces wrong side in and realized something amazing- since my fluffy piece was part of the original piece, I could see exactly where the original was sewn. This allowed me to use this old seam as a guide and meant that I was exactly reproducing the original.
And once those were put together, I just had to flip the whole thing right side out...
Step 5: The bottom
The bottom piece was very much like the top, except there was no fluffy piece. Since following the existing seam worked so well, I decided to try that again. Basically, I flopped my fabric together wrong side in and pinned my patterny piece on top.
All I had to do from there was follow the seam again and flip it right side out. OH and an important note that I may not have made clear yet- on both the backy piece and the bottom piece, I only sewed 3 sides (making an oddly shaped pillow case essentially). One of the things that I didn't like about the original chair was that the covers couldn't be removed for washing. I wanted to make sure that my covers could come off because 1) I'm a spaz and I spill things 2) there is a solid chance that a cat (or maybe even dog) will try and sleep on this thing and 3) babies are messy. So at this point, both my backy piece and bottom piece have an open, unfinished edge.
Step 6: The Side Pieces
These were possibly the hardest thing to figure out about this whole project. This is where I started following this tutorial. I didn't want to take these pieces apart because I wanted to be able to use the snaps that were already in place. I started by roughly tracing these guys on the wrong side of my fabric.
Then I cut my pieces out, pinned them together, and sewed the following my chalk line. The result was very little oddly shaped pillow cases (closed on three sides and open on one).
Step 7: Finishing the Edges and Closing her Up
Since all of my pieces has an unfinished edge, I clearly needed to do something about that. I carefully folded the edge under and zipped in a quick hem.
Pretty easy and fancy looking! To close my pieces, I figured I would just use velcro...
Of course, I bought black velco so you can't really see it, but I promise, its there. But really, it didn't need to be. The velcro didn't stick very well and when I put everything together I realized that you couldn't even see the bottom of the pieces. So I ripped the velcro off and my bottoms are hanging open (don't tell).
Step 8: Those stupid little side pieces...
Okay, so my side pieces are tricky- they are attached to the chair by snaps at the top and the bottom. Since the bottom was open, it was easy to snap those babies in. Following my tutorial, I cut slits in the already sewn top part to expose the snaps.
Now, friends, here is where I went wrong. I cut my holes and then tried to install the damn thing, only to find that my holes were way off. Here is what I recommend... cut a hole for your middle snap, snap it to the top part of the chair. From there, figure out where you need to cut for your left snap and then cut that hole. Repeat for the right snap. I ended up having to cut some HUGE holes in order to get everything snapped in. You can't see them, but I know they are there and they bother me.
Step 9: Secure the back...
Since the back is so tall, it has to be secured or it will flop over. To do this, I put the back in the chair and marked where I wanted to secure it.
Then all I did was stitch on some long, skinny pieces that could tie around the bars of the chair...
Step 10: DONE!
I am insanely proud of this project. It looks surprisingly good, especially when you consider that I can't really sew. Just for fun, lets look at the start and the end together...
YAY!
But seriously, kudos to anyone who can follow this convoluted tutorial. More than anything, I hope this inspires y'all to tackle projects that are way out of your league (because sometimes they turn out okay). Anyone else insanely proud of a project?
- This post is going to be very long and have way too many pictures.
- While this is supposed to be a tutorial, it probably won't make very much sense at all.
- Really, I have no sewing skills. If I can do it, you can do it.
You can't really tell in the photo, but the fabric is a nice light blue and white stripe. Want a close up?
Not bad, just not what we are going for...
So to get started, first I panicked and then I pinned (as in, consulted Pinterest). I found two great tutorials (this one and this one) and decided to mix those methods for my plan of attack.
Step 1: Rip some seams
I used my seam ripper to pull apart the top backy piece and the bottom piece. This left me with the inserts for the back and bottom and pieces that I could use as a pattern.
| BEFORE |
| After |
Step 2: Make a Pattern
For this project, we wanted some nice soft, baby friendly fabric. Although, it is not upholstery fabric, I picked up some black minky dot fabric from Hobby Lobby (love their sales!). I got 3 1/4 yards and had a lot left over. I think 2 1/2 yards would have worked. So, back to work... I laid my old pieces out and pinned them to my new fabric and cut (generously) around them.
Step 3: Keeping the seams
This step can also we called: here's where it starts to get complicated... but not really. So, if you look at the original glider, you'll see all these nice seams on the back piece. Since I planned to use the fluffy back piece (like in this tutorial), I figured I should add the seams. I found out the hard way (I snapped a needle) that the best way to do this is to use a heavy duty needle and just gently follow the seam lines that are already laid out.
![]() |
| So (sew?), this is the fluffy back piece pinned to my fabric. I essentially just sewed into these lines to secure the fluffy piece to my new fabric. |
![]() |
| I know its hard to see, but the lines are there! Success! |
So now I have one backy piece attached to a fluffy piece and I need to attach the other backy piece, essentially making a giant, oddly shaped pillow case. I pinned my pieces wrong side in and realized something amazing- since my fluffy piece was part of the original piece, I could see exactly where the original was sewn. This allowed me to use this old seam as a guide and meant that I was exactly reproducing the original.
![]() | ||||
| See- all I had to was follow the seam... |
And once those were put together, I just had to flip the whole thing right side out...
![]() | ||||
| Not bad for someone who can't sew! |
Step 5: The bottom
The bottom piece was very much like the top, except there was no fluffy piece. Since following the existing seam worked so well, I decided to try that again. Basically, I flopped my fabric together wrong side in and pinned my patterny piece on top.
All I had to do from there was follow the seam again and flip it right side out. OH and an important note that I may not have made clear yet- on both the backy piece and the bottom piece, I only sewed 3 sides (making an oddly shaped pillow case essentially). One of the things that I didn't like about the original chair was that the covers couldn't be removed for washing. I wanted to make sure that my covers could come off because 1) I'm a spaz and I spill things 2) there is a solid chance that a cat (or maybe even dog) will try and sleep on this thing and 3) babies are messy. So at this point, both my backy piece and bottom piece have an open, unfinished edge.
Step 6: The Side Pieces
These were possibly the hardest thing to figure out about this whole project. This is where I started following this tutorial. I didn't want to take these pieces apart because I wanted to be able to use the snaps that were already in place. I started by roughly tracing these guys on the wrong side of my fabric.
Then I cut my pieces out, pinned them together, and sewed the following my chalk line. The result was very little oddly shaped pillow cases (closed on three sides and open on one).
Step 7: Finishing the Edges and Closing her Up
Since all of my pieces has an unfinished edge, I clearly needed to do something about that. I carefully folded the edge under and zipped in a quick hem.
Pretty easy and fancy looking! To close my pieces, I figured I would just use velcro...
Of course, I bought black velco so you can't really see it, but I promise, its there. But really, it didn't need to be. The velcro didn't stick very well and when I put everything together I realized that you couldn't even see the bottom of the pieces. So I ripped the velcro off and my bottoms are hanging open (don't tell).
Step 8: Those stupid little side pieces...
Okay, so my side pieces are tricky- they are attached to the chair by snaps at the top and the bottom. Since the bottom was open, it was easy to snap those babies in. Following my tutorial, I cut slits in the already sewn top part to expose the snaps.
![]() | ||
| If you look closely, you can see the snap |
Step 9: Secure the back...
Since the back is so tall, it has to be secured or it will flop over. To do this, I put the back in the chair and marked where I wanted to secure it.
Step 10: DONE!
I am insanely proud of this project. It looks surprisingly good, especially when you consider that I can't really sew. Just for fun, lets look at the start and the end together...
| Before |
![]() |
| After |
But seriously, kudos to anyone who can follow this convoluted tutorial. More than anything, I hope this inspires y'all to tackle projects that are way out of your league (because sometimes they turn out okay). Anyone else insanely proud of a project?
Thursday, August 16, 2012
Quick Gallery Ledges
How bout a quick project post? And one that is super easy and really cheap!
When I lasted updated y'all on nursery progress, we finally had most of the furniture in place. I figured we needed something on that huge expanse of wall above the crib. I knew I wanted to display family pictures and other fun stuff, but wasn't sure of exactly how I wanted to proceed. A quick search over at Ana White and I knew I had my solution- $10 ledges.
I won't bore you with details on how to pull off the these bad boys because Ana's directions are easy to follow. Plus, we forgot to take pictures as we went. I think they took us all of 10 minutes to put together. Seriously, these are really freaking easy. Plus I like that ledge has a lip on it, so no major worries about things falling into E's crib.
Once we had the ledges up and secure (we actually did this the proper way and found studs to attach them too. We are serious when it comes to Ella's safety), it was time to think about decorating. I didn't want to spend a ton on new frames, so I took a quick trip to Goodwill. I was able to snag 7 frames in several sizes for less than $20. The frames were scary to start with, but a quick spray with white spray paint quickly fixed that (sorry- no pictures again. My brain doesn't work right).
I then tasked Seth with picking out some family photos and I did the same. After some quick editing and resizing, they were ready to go.
And up on the ledge they went, along with some other items we collected...
On the top shelf: A Babar Book, a sign that says "though she be but small, she is fierce," a picture from our wedding of my mom, sisters and me, a picture of Seth's parents, a picture from our engagement session, and a book called the Littlest Elephant.
On the bottom shelf: An E sign that I found at Michaels, a picture from when Seth and I first started dating, a picture of Seth and his brother, a picture of my dad and me, another book, a picture of Seth and his mom, a sign that says "let her sleep for when she wakes she will move mountains," and a stuffed zebra that Seth couldn't resist (my husband is such a softie- this little girl has him wrapped around her finger already).
In all, I love how the shelves turned out. They are sweet and sentimental without being too in your face. AND for all of y'all that are wondering about her pulling shit down, we are pretty sure that we put them high enough that she won't be able to reach them. If we didn't, we will certainly make changes when that time comes.
When I lasted updated y'all on nursery progress, we finally had most of the furniture in place. I figured we needed something on that huge expanse of wall above the crib. I knew I wanted to display family pictures and other fun stuff, but wasn't sure of exactly how I wanted to proceed. A quick search over at Ana White and I knew I had my solution- $10 ledges.
I won't bore you with details on how to pull off the these bad boys because Ana's directions are easy to follow. Plus, we forgot to take pictures as we went. I think they took us all of 10 minutes to put together. Seriously, these are really freaking easy. Plus I like that ledge has a lip on it, so no major worries about things falling into E's crib.
Once we had the ledges up and secure (we actually did this the proper way and found studs to attach them too. We are serious when it comes to Ella's safety), it was time to think about decorating. I didn't want to spend a ton on new frames, so I took a quick trip to Goodwill. I was able to snag 7 frames in several sizes for less than $20. The frames were scary to start with, but a quick spray with white spray paint quickly fixed that (sorry- no pictures again. My brain doesn't work right).
I then tasked Seth with picking out some family photos and I did the same. After some quick editing and resizing, they were ready to go.
And up on the ledge they went, along with some other items we collected...
On the top shelf: A Babar Book, a sign that says "though she be but small, she is fierce," a picture from our wedding of my mom, sisters and me, a picture of Seth's parents, a picture from our engagement session, and a book called the Littlest Elephant.
On the bottom shelf: An E sign that I found at Michaels, a picture from when Seth and I first started dating, a picture of Seth and his brother, a picture of my dad and me, another book, a picture of Seth and his mom, a sign that says "let her sleep for when she wakes she will move mountains," and a stuffed zebra that Seth couldn't resist (my husband is such a softie- this little girl has him wrapped around her finger already).
In all, I love how the shelves turned out. They are sweet and sentimental without being too in your face. AND for all of y'all that are wondering about her pulling shit down, we are pretty sure that we put them high enough that she won't be able to reach them. If we didn't, we will certainly make changes when that time comes.
Tuesday, July 17, 2012
Silhouette Art
Step 1: Pick your paper
I found all the cute paper was 12x12 size, so my next step was to cut the paper down to 8.5x11 so I could put it through my printer. Why do I need to put it through my printer, you ask? See step 2!
Step 2: Print your critters
I don't know about you, but I can't draw an animal. I promise. So instead, I used good old clip art to find some critters. Once I selected my critters, I sized them to where I wanted them and changed the color so that it was light and only just an outline (if possible). And then I printed on the BACK of my paper.
Step 3: Cut out your critters
Step 4: Glue to backing paper and frame
See, stupid easy. And crazy cute. I think in all this took less than an hour. And there was some complicated cutting involved.
Anyone else have any simple, sweet projects to share?
Subscribe to:
Posts (Atom)